“Website Gallery” Documentation by “Jordie Bodlay” v1.0
“Website Gallery - Installation Guide”
Created: 9th August 2011
By: Jordie Bodlay
Email: jordie@jordie.org
Thank you for purchasing Website Gallery. If you have any questions that are beyond the scope of this help file, please feel free to email via my user page contact form here.
Table of Contents
- Introduction
- Step 1 - Database Details
- Step 2 - Upload
- Step 3 - Web Installation
- Step 4 - Accessing the Control Panel
- Step 5 - Viewing the Gallery
Introduction - top
Website Gallery is a PHP script designed to allow you to quickly add and display a collection of albums on your website from multiple Facebook pages or user accounts.
Installing Website Gallery is easy. If you have any problems or require any help, don't hesitate to contact me via my profile page on codecanyon.net.
Website Gallery requires the use of a MySQL database. Please ensure you have your database details ready for installation. These can usually be found in your web-hosting control panel.
Step 1 - Database Details - top
Before you upload anything to your website, in the webgallery directory you will find a file called wg_config.php. Edit this file with a text editor and insert your MySQL database details. These are the lines to change:
define ('WG_DB_HOST', 'localhost');

define ('WG_DB_USER', '');

define ('WG_DB_PASS', '');

define ('WG_DB_NAME', '');
As an example, lets say your hostname stays as localhost (usually the case, and if you can't find what your hostname is, it will probably be 'localhost'), your username is my_user, your password is example and your database name is my_database then this is what you should have:
define ('WG_DB_HOST', 'localhost');

define ('WG_DB_USER', 'my_user');

define ('WG_DB_PASS', 'example');

define ('WG_DB_NAME', 'my_database');
Step 2 - Upload - top
Upload the files from the package using FTP to a location that is accessible via the web. It is usually best to upload these files to their own folder, such as a folder called webgallery that would be located at http://www.example.com/webgallery/.
Once the files are uploaded, you will see a folder called photos. You must make this directory writeable. For unix-based servers, this means using your FTP client to CHMOD this diretory to 757 or 775 (depending on your server set up).
Step 3 - Web Installation - top
Once the files are located somewhere that is accessible via the web, you'll be able to install the script (provided your MySQL details are correct). Navigate to the admin folder in your installation. For example, if you installed the Website Gallery script at http://www.example.com/webgallery/ then point your web-browser to http://www.example.com/webgallery/admin/
Once the page has loaded, it will ask you for a username and a password to set for the control panel access. Enter your desired username and password and click 'Install'. If the installation is successful, you'll be redirected to the control panel to login.
Step 4 - Accessing the Control Panel - top
After the web installation, you will be directed to your control panel. You can login using the username and password you selected during installation.
For future use, your control panel can always be accessed at http://www.example.com/webgallery/admin/.
For more information on using the Control Panel, see the User Guide.
Step 5 - Viewing the Gallery - top
Using the above installation example, you can view your gallery at http://www.example.com/webgallery/webgallery.php. When viewing the control panel, you can click on the "View Gallery" link in the top right and it will take you to this page.
Installing the Website Gallery Plugin to Wordpress - top
Website Gallery is really easy to include into Wordpress. A plugin has been included to make this step simple. In the ZIP file that you downloaded from CodeCanyon, you will see a directory called wordpress_plugin. Inside this directory is a file called webgallery.php and a folder called 'webgallery'. Upload this both the file and folder into the plugins directory in your Wordpress installation. This should be: wp-content/plugins/.
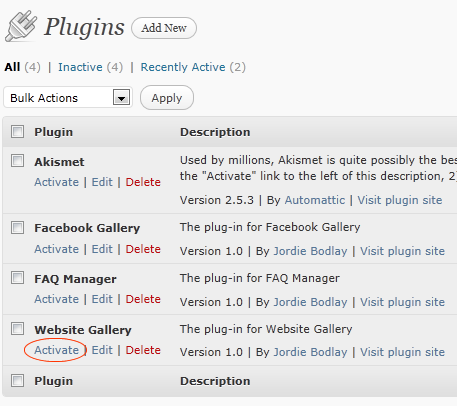
Once it is located in the correct folder, login to your Wordpress admin and click on 'Plugins' on the left menu. You will now see "Website Gallery" listed among the plugins. Click the "Activate" link below it to enable the plugin.
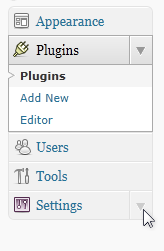
Once activated, click the arrow next to "Settings" on the left menu to expand the sub-menu.
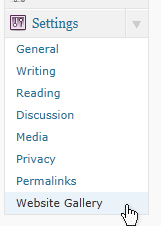
Then click the "Website Gallery" link.
You will then be presented with a page like the following, with 1 option.
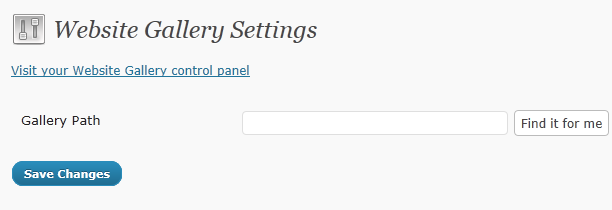
The "Gallery Path" will be blank to begin with, you need to enter the path on your server to the Website Gallery directory. (note: this is the server path and not the URL). You can click the "Find it for me" button and the plug-in will attempt to find the installation.
If the "Find it for me" button was not successful in finding the Website Gallery, you'll need to go to your Website Gallery admin and click on the 'Script Info' in the top right. Ensure the 'Insert to Wordpress' tab is selected. You should see something like the below:
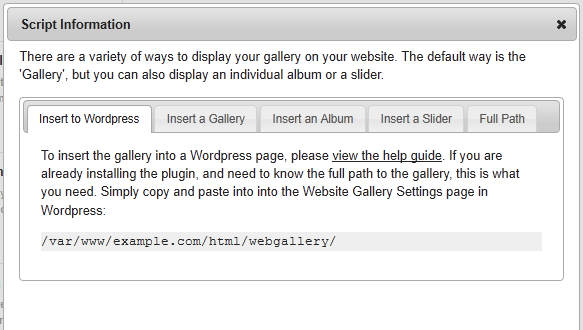
Copy the path to Wordpress.
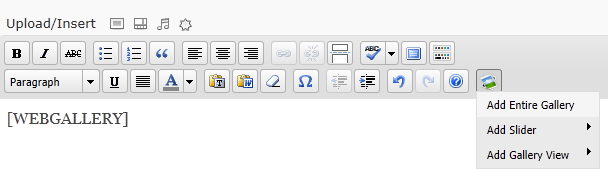
Once the path has been saved, you can now add or edit a page or post in Wordpress. In the editor you will see a new button as in this image:

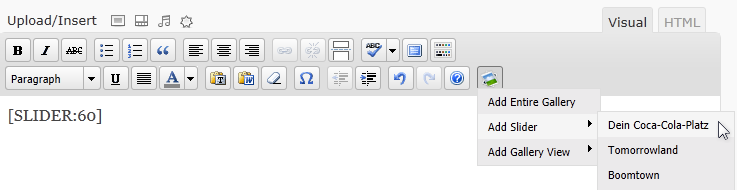
Click this button and you'll be able to insert the gallery, a single album or a slider into the page. It does this by inserting a special placeholder code into the page. This code represents where the gallery, album or slider will be displayed.
Including into another PHP Script - top
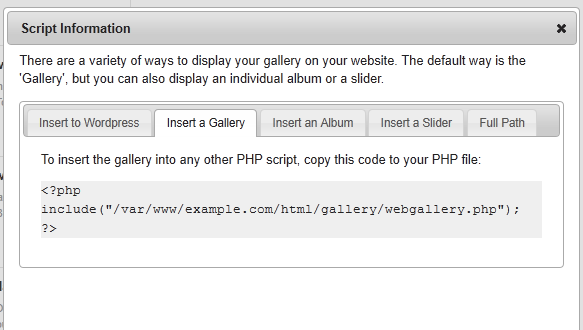
If you're installing into any other PHP script, you can get the PHP code you need to use by clicking on the 'Script Info' link at the top of your control panel.
This dialog will give you the PHP code to insert into your PHP page to include the gallery. There will be other tabs where you can generate code to insert just a single album or a slider onto a page.
Once again, thank you so much for purchasing this script. As I said at the beginning, I'd be glad to help you if you have any questions relating to this theme. No guarantees, but I'll do my best to assist. If you have a more general question relating to the themes on CodeCanyon, you might consider visiting the forums and asking your question in the "Item Discussion" section.
Jordie Bodlay